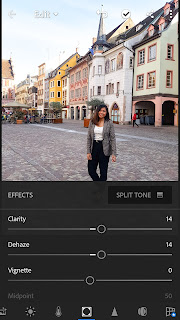
Basic Edit in Lightroom
I've used so many apps to edit my photos: VCSO, Facetune, Instagram, now Lightroom. I wasn't content of the theme I wanted on my Instafeed until I fiddled around with Lightroom. I'm still a beginner but I hope I can still help you! I taught myself how to upload presets and create presets. There are numerous presets online that are free. But no matter what, you will have to adjust the settings. So, I'm going to share with you how to edit your photo in Lightroom, mind you this is a VERY BASIC edit.
Start by uploading a photo in Lightroom and adjust according to what I have done or what suits you.
 |
| This is the original picture |
 |
| Light Settings |
 |
| Scroll down to reduce blacks |
 |
| Colour Settings |
 |
| Effects Settings |
 |
| Detail Settings |
 |
| Scroll down Detail Settings |
 |
| I went back to Light Settings to make it more brighter |
 |
| Cropped the Image |
 |
| Then finish! |
 |
| Click the three dots on the top right corner, name your preset, then ✓! |
I hope this has helped you get to know a little bit of Lightroom. I will create another post about downloading presets, setting a mood in the photo, a different type of photo edit: scenery.
Talk to you soon,
Charmaine


